
How to Add Search to your Gatsby with Webiny Site
Search is one of the most used features. It helps your visitors find what they are looking for faster. In this article, I’ll be walking you through how to add search to your Gatsby with Webbiny site.
we need 3 required components to implement search:
The search index
=> gatsby-plugin-local-search
The search engine
=> useFlexSearch hook from react-use-flexsearch
Search UI
=> a component on your site that allows user to type in search query and view results
Preference link: https://www.gatsbyjs.com/docs/how-to/adding-common-features/adding-search/
Let’s get started
Setting up the search index
Preference link : https://www.gatsbyjs.com/plugins/gatsby-plugin-local-search
First, We need to install gatsby-plugin-local-search to our project
=> npm install –save gatsby-plugin-local-search
Next, We need to configure the plugin in gatsby-config.js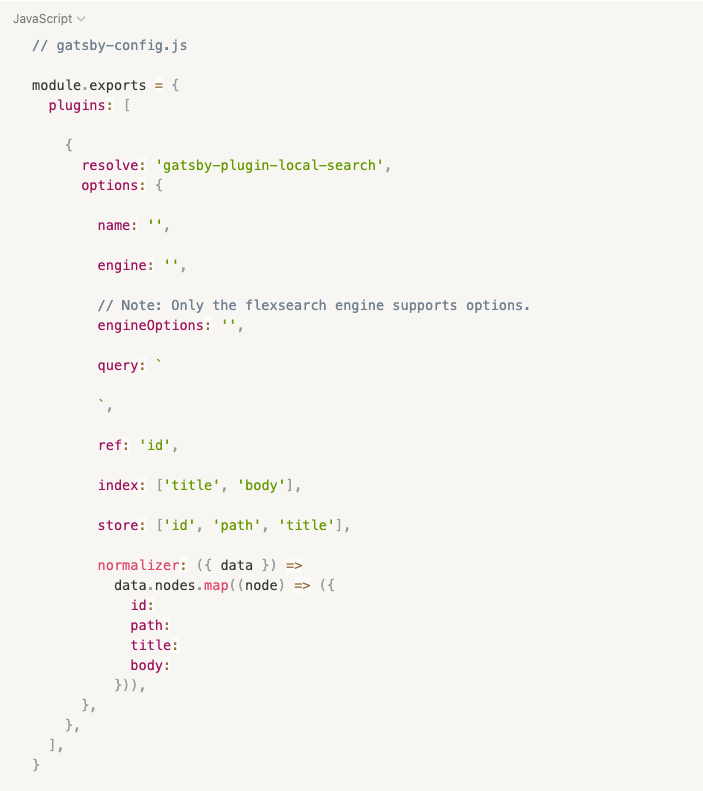
Let’s go through each option:
– name:
Identifies your search index and allows you to search for a specific index
– engine:
Allows creating indexes. There are 2 supported engine are FlexSearch and Lunr.
In this article, we are using FlexSearch which takes your search query, index, and store and returns results as an array. Searches are memoized to ensure efficient searching
– engineOption:
Allows you to customize your engine and this can help improve your result in memory and query time
– query:
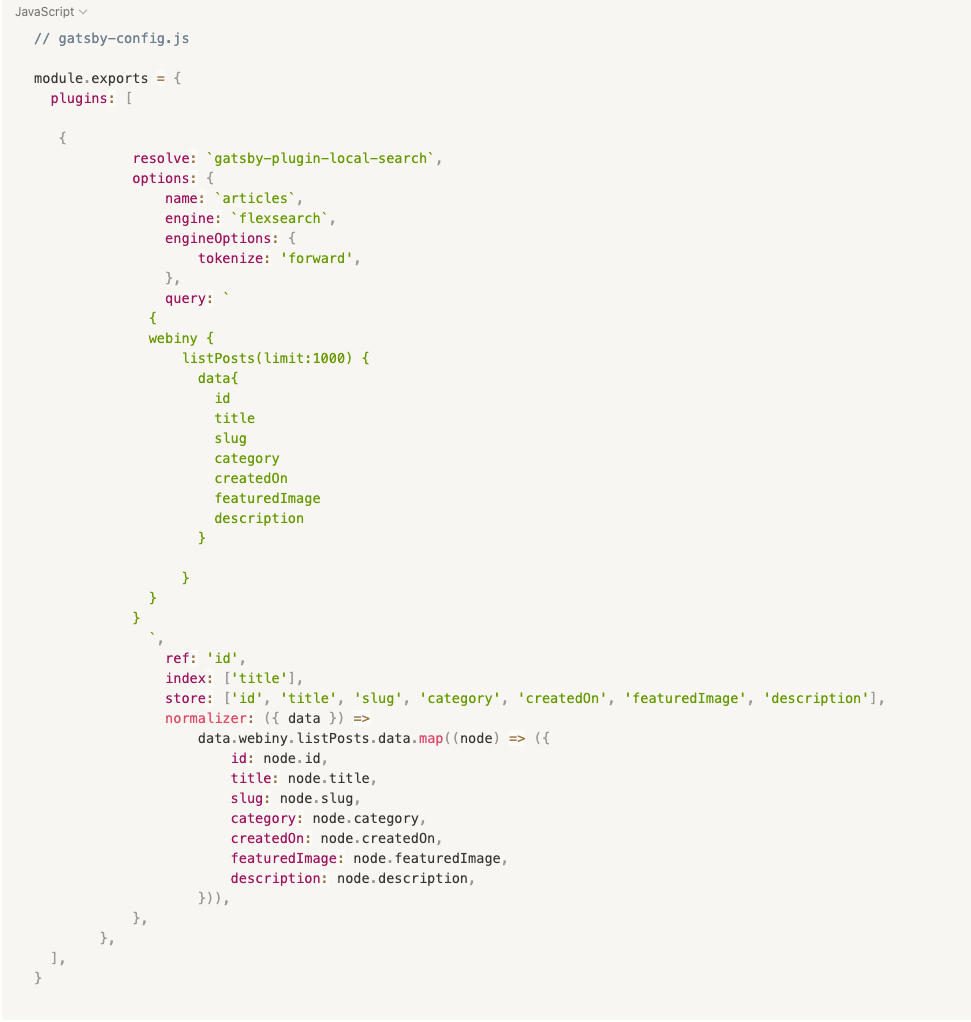
Is the GraphQL query used to grab data for all our posts
In this article, we are using Webiny CMS
– ref:
Determines for a unique value. By default, ref is configured to use the id field, but if your posts have other unique fields like slug or url…You can use those
– index:
This is an array where you list out which fields you want your FlexSearch to search from
In our example, we implement a search by title, so we’re going to index title, but you can add other filed like categories and author to fit your need
– store:
This is an array where you list out which fields you want FlexSearch to return in the results
– normalizer:
Data is fetched from our query may be complicated and nested that search engine can’t process, so normalizer here to help transform complicated data to a flat and simpler
Get to code
Now we need a search UI component and add search engine to this component
=> npm install –save react-use-flexsearch
Create search.js
– Query for the index and store. Note that since we configured name in options of gatsby-plugin-local-search articles. We need to name the query field localSearchArticles
– Pass index, store and search query value into FlexSearch
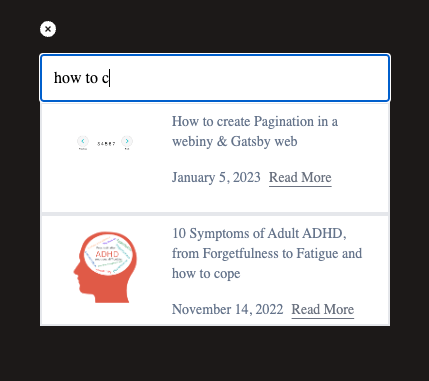
– Component renders an input and the search result
This is a code example without style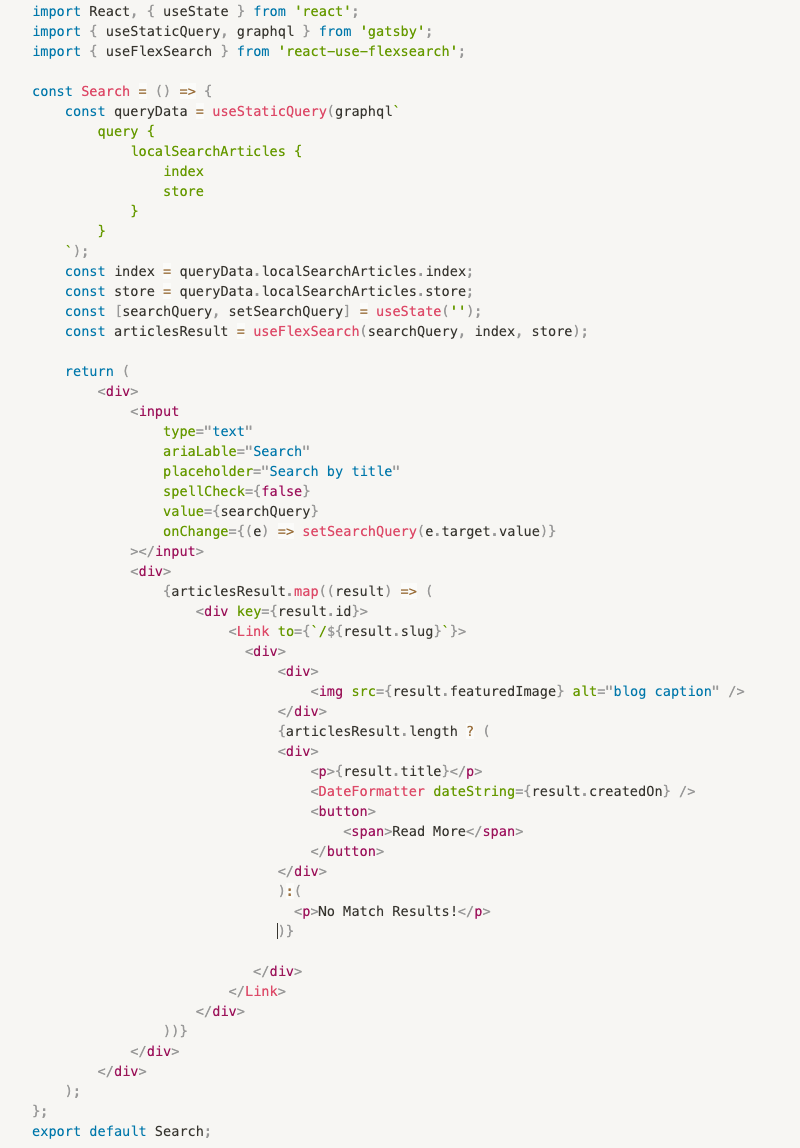
Hopefully this article helps you understand the process of adding search to your Gatsby site using FlexSearch. Good luck!